Tuesday, 30 December 2014

Easy No Fuss Fresh Peach Ice


The approach of Christmas and New Year flags peach season at our house!

We have a glorious Anzac Peach tree in the backyard which - with a little TLC throughout the year - rewards us with buckets and buckets of sweet, juicy, yellow fleshed peaches.

Peaches are one of my favourite fruits. I have fond childhood memories of summers long past sucking the warm sticky juice from glorious peaches picked fresh from the tree by my late Grandfather - a most wonderful gardener!

Peach season signals a flurry of activity in my kitchen - those peaches are not to be wasted! I make jams and sometimes chutneys, freeze slices and halves poached in light syrup, and make endless desserts that include fresh fruit salads, peach pies, tarts, upside down cakes and my favourite - roast peaches drizzled with a mixture of butter and brown sugar that forms a toffee sauce in the pan.

A favourite with our grandsons, this easy Peach Ice recipe evolved from the Cantalope Ice recipe featured in 'The Australian Women's Weekly New Cookbook' edited by Ellen Sinclair and published way back in 1978.

Not only is this Peach Ice a refreshing and tasty sweet - but you will be amazed at how easy and no fuss it is make! The peaches do not need to be peeled. That's right - no messy, time consuming peeling is involved, and a food processor or stick blender will make blitzing the fresh peaches to a pulp a breeze!

Serve the ice with fresh sliced peaches mascerated in a little sugar to draw out the juices, together with a generous dollop of thick cream. Yum!

Three grandsons love the Peach Ice served in a cone! It melts quickly - just as well it is eaten even quicker!

For Adults only: Just between you and me a sensational adult version can be made mascerating the peaches in a little Grand Marnier or Cointreau! Shhh, don't tell!


Easy No Fuss Fresh Peach Ice


1 kilo fresh ripe yellow peaches (7 or 8 good sized peaches)
1 cup water
1 cup sugar
1 cup freshly squeezed orange juice

Method


Boil the sugar and water in a saucepan until a light syrup forms - about 10 minutes.

Meanwhile wash the peaches and trim any bruised areas. Leaving the skin on slice the peaches into chunks, removing the stone and any stem.

Place half of the chunks of peach and half of the orange juice in the food processor or blitzing jug of the stick blender. Puree. Pour into a large bowl. Repeat with the remaining peach chunks and orange juice.

Add the hot syrup to the bowl of puree and stir thoroughly.


Pour the puree mixture into a sterilized 2 litre container. Top with the lid and place into the freezer. There is no need to stir the ice mixture during the freezing process - I meant it when I said it was no fuss and easy!


Enjoy!

Wishing you all a very Happy New Year! May 2015 be a wonderful year!

Cheers!

Marian


Thursday, 4 December 2014

In My Kitchen ... in December

I can't believe that this is the last In My Kitchen post for 2014! This fabulous series, hosted by Celia at Fig Jam and Lime Cordial, is a fascinating sneak peak into the kitchens of bloggers from around the world. Thank you, Celia, for the opportunity to particpate!


In My Kitchen ... in December 


Christmas planning is in full swing! That means I'm planning to make this Christmas recipe - my all time favourite! Perfect for any Christmas party it's my spectacular Meringue and Red Fruit Salad Christmas Wreath. Loaded with the gorgeous red fruits of our Aussie summer season - cherries, watermelon, strawberries, blueberries, red seedless grapes and redcurrants soaked in a luscious boozy syrup it takes pavlova to wonderful new heights!


The Christmas Pudding has been made! This year I've used Stephanie Alexander's recipe passed on to her from her grandmother, Emily Bell. You will find the recipe in her 'go to' book The Cook's Companion - one of my most used cookbooks. It's the first pudding I've cooked using suet - and I'm thrilled with the result!


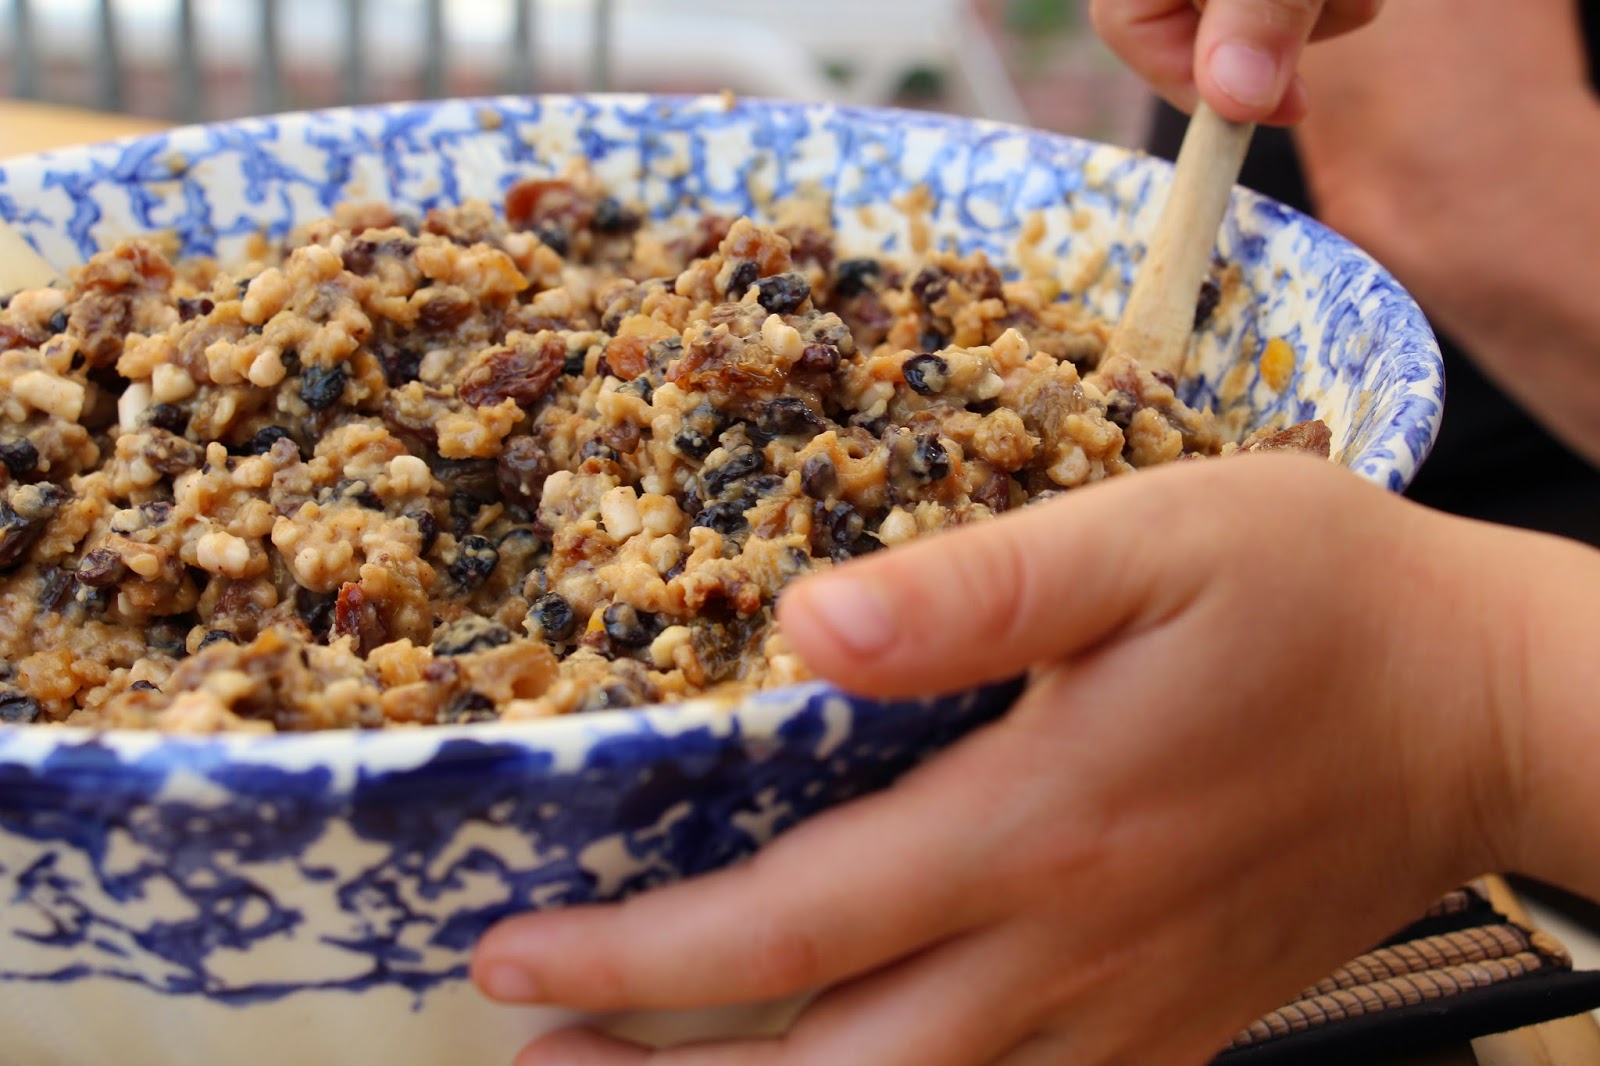
The family gathered to stir the Christmas pudding prior to cooking. Everyone made a wish - and we stirred and made wishes for those who couldn't attend. I hope they like what we wished for them!!!


We've had another birthday! This time I revisited a favourite cookbook I hadn't visited for ages - The Gretta Anna Recipes (orange cover) published in 1978. I made - for the first time - the Chocolate Torte Los Angeles. Wow! Where has that recipe been all my life! It was marked 10/10 by everyone - adults and children alike. Already I have requests from several family members to make it for their birthdays! If you have the book - this recipe is a winner!


I just love being able to use produce fresh from the garden and these little beauties are the first tomatoes of the season. This summer I'm trying straw bale gardening for the first time. Has anyone else tried this?


This Father Christmas plate has been with us for over 30 years now. It has a couple of 'love bumps' along the edges but filled with Christmas truffles and chocolates no-one notices - and I'm not retiring it any time soon!


Father Christmas bought me an early Christmas present - this SOLIDTEKNICS AUSfonte Sauteuse pan, manufactured right here in Adelaide. Recently recommended by my friend Liz of Bizzy Lizzy's Good Things it is amazing! I have never cooked better steak in my life! Thanks for the recommendation, Liz!


Finally, wherever you are, I wish you and yours the most wonderful Christmas and New Year. May health, happiness, peace and gratitude fill your hearts throughout the coming year.


Merry Christmas!

Cheers!

Marian


Thursday, 13 November 2014

Entering the Hummus Wars!


This is a brave post, a very brave post! I have decided, after a great deal of hand wringing and a couple of sleepless nights to enter 'the hummus wars'. Yes, I'm sharing my recipe for hummus!

I still can't quite believe that I'm putting my recipe out there - alongside the recipes of great foodwriter Yotam Ottolenghi, and chef with cred,  George Calombaris!

Made from scratch my recipe is different in that it has a lovely 'tang' or 'bite'. It can be varied endlessly, and, well - everyone I know loves it and I'm regularly emailing the recipe to converts! So, (taking a big breath) here it is!


Hummus - My Way!


Ingredients


250 grams dried chick peas* – I prefer to use Ord River chickpeas, but use any good quality chickpea
1 tablespoon creamy tahini (health section of supermarket)
1 teaspoon cumin (powdered)
1 mild red chilli diced (optional)
Juice and grated rind of 1 lemon (optional)
½ cup vinegar (homebrand) plus extra
½ cup extra virgin olive oil plus extra
Salt and pepper

Method


Soak the dried chickpeas in a very large bowl of water overnight. The chickpeas will swell up absorbing much of the water. Cover with more water if needed. Next morning pour the chickpeas and water into a large saucepan, add more water to cover the chickpeas by 3 to 5 centimetres. 


Bring to the boil and cook gently until the chickpeas are soft when tested. This will take 15 – 20 minutes. 

Tip:do closely watch that the chickpeas don’t boil over – it makes a big mess!

Drain the chickpeas into a colander when warm and place in food processor. Add the tahini, cumin, vinegar, oil, salt and pepper to taste together with the chilli and lemon juice and rind if using. You could also add a clove of crushed garlic at this point if you wish. 

Blitz!!!

Keep adding equal quantities of vinegar and oil until the mixture is ‘loose’. It thickens with standing!
Adjust the seasonings to taste.

Serve with pieces of pitta bread, savoury biscuits, grissini or vegetable crudites. It makes a healthy and delicious breakfast spread on grainy bread toast topped with slices of tomato and avocado, and can be used as a spread in sandwiches.

This makes enough for a crowd - if it lasts that long!

Enjoy!


Marian


*Use 2 cans of drained chickpeas if you prefer

**The cheapest vinegars give the bitiest tang to this hummus and allow it to keep for several days in the refrigerator. Hummus is no place for a delicate vinegar!


Wednesday, 5 November 2014

In My Kitchen ... in November


I can't believe that it's November already and time for another In My Kitchen post! This year is just flying by at our house!


Because a number of family members have birthdays during October and November I have the perfect excuse to whip up a celebratory cake or two! This one - from the archive that is my 'Brown Book' (and the repository of my favourite recipes across the wonderful years of my marriage) I hadn't made for years. It's named Gateau Belle Helene - and after all these years I don't know where I originally found the recipe.  I decided to give it a modern twist by poaching the pears in a syrup flavoured with honey, star anise and black peppercorns. It got a thumbs up all round!


I enjoy tea and find this one, 'Just Lavender' from T2, to be delicate and calming. It's a perfect drink to have before bedtime.


I have read a number of IMK posts featuring Heilala vanilla and was thrilled to find that my favourite greengrocers shop 'Metropolitan Fresh Fruiters' at 'The Avenues' Shopping Centre, St Peters is now stocking it. I can't wait to put those pods to use - the perfume alone is heavenly!


In my kitchen this month I put the Nelshaby Capers featured in last month's post to good use. Together with a bay leaf, fresh thyme and basil from the garden they added superb flavour to this chick pea braise.


I tidied my utensil drawer recently - and to my amazement filled this stone jar with wooden spoons, spatulas and balloon whisks! No wonder the drawer was overflowing!


With the warmer weather upon us it is a pleasure to again cook outdoors in the garden. I do love a good chargrilled vegetable or two!


Finally, my kitchen disaster for the month! In a brain fade moment, whilst making a gorgeous White Chocolate and Cinnamon buttercream icing, I turned the mixer to high - just after adding the icing sugar to the butter. That icing sugar flew everywhere! The mess, oh, the mess! I won't be doing that again any time soon!


Have you had a kitchen disaster recently? Do tell!

If you have enjoyed peeking into my kitchen this month do click through to Celia's Fig Jam and Lime Cordial blog where you can peek into her kitchen and the kitchens of bloggers from around the world.

Thanks so much for dropping by!

Cheers!

Marian

Tuesday, 21 October 2014

The Best Vanilla Cake with White Chocolate and Cinnamon Buttercream Icing


A heart warming request from grandsons for 'a cake baked by Granny' for their school lunch boxes saw me delve into my 'Brown Book' for this recipe. An easy-to-make one bowl cake it was a regular in my children's lunch boxes more years ago than I care to say here!

The recipe means a great deal to me bringing back wonderful memories of our late friend, Val, who passed it on to me. Those memories include the wonderful late night suppers that were a Thursday night Table Tennis tradition, the resulting 'tired eyes' on Fridays at school, and celebrating a Grand Final win with too much Southern Comfort! Ouch!

I make this as a large slab cake for general use ie lunch boxes, or in two round cake tins if making a celebration cake with layers. The choice is yours!

The cake also keeps well in the freezer if you are needing to plan ahead. If by chance you have cake left over for any reason it is fabulous in a great trifle!


The Best Vanilla Cake


3 cups Self Raising flour
4 tablespoons custard powder
250 gms soft butter
1 3/4 cups sugar
4 large eggs (I use 700gm size)
1 cup milk
1 teaspoon vanilla extract


Method
Sift the flour and custard powder into your large mixer bowl. Add the sugar, butter, eggs, milk and vanilla.

Beat together on a medium speed for 10 minutes.


For slab cake line a roasting pan with baking paper. For round cakes use two sponge tins or two 21 cm springform pans.

Bake in a moderate oven (I do 165C in my fan forced oven) for approximately 30 minutes or until golden on top and a skewer pulls out clean.

Remove from the oven and cool on a cake rack. Carefully turn out and ice.


White Chocolate and Cinnamon Butter Cream Icing


3 cups icing sugar
250 gms soft butter cut into cubes
1/2 cup white chocolate buttons
3 tablespoons milk
Generous pinch of cinnamon

Method
Sift the icing sugar, add the soft butter and beat together slowly for a minute or so to blend the icing sugar and butter together.

Warning: Turn the dial to high - like I did (in a brain fade moment!) - will result in a BIG mess! See what I mean in the picture below!


Melt the white chocolate buttons in a ceramic bowl using short blasts in the microwave to do this. Stir gently to a paste and add one tablespoon of warmed milk (blood temperature). Stir until thoroughly combined. 

Add to the icing sugar mixture with the remaining cold milk. Beat on high until a rich and fluffy buttercream has formed. Add the cinnamon and beat thoroughly. 

Ice your cake generously. Sprinkle over with coconut.


Enjoy!

Cheers!

Marian


Thursday, 9 October 2014

In My Kitchen ... in October

Life has been busy this month! Four generations of our family gathered for a family holiday at our newly renovated beach house at Coffin Bay. It certainly made for fun in the kitchen!


Continuing the journey to preserve our family's culinary history Yiayia - 88 years young - taught us how to make Chicken Pilaf. It is one of our family's most favourite dishes.


Three enthusiastic (and hungry) grandsons were my assistants baking these yummy Anzac biscuits. Given how tasty the biscuit dough seemed to be I'm amazed that we had leftover to bake!


Anzac biscuits are perfect with a cup of Greek coffee we found! I love these cups and plates found at  IKEA.


A family gathering called for Sunday morning Greek pancakes. This was all that was left of this local (Eyre Peninsula) award winning honey when we had finished! It is a beautiful honey - I can highly recommend it!


In my holiday kitchen I made vast quantities of hommous. I prefer to do this from scratch soaking the chickpeas overnight rather than using cans of chickpeas.


I'm looking forward to trying these capers which are produced in the Southern Flinders Ranges.


Cooked up in a light fresh tomato and chilli broth by daughter Sophie, these succulent fresh mussels fresh from the sea were amongst the best I've ever eaten.


Finally, in my holiday kitchen we enjoyed salmon as our 'Catch of the Day'. Caught at what must be one of the most beautiful beaches in the world - Gunyah Beach in the Coffin Bay National Park - the boys were well pleased with themselves.


Thank you so much for visiting my holiday kitchen. Do you too, enjoy locating/catching/cooking local produce when on holiday?

To peek in other fabulous kitchens around the world visit Celia's Fig Jam and Lime Cordial blog where the In My Kitchen series is hosted. It is well worth the visit!

Love to hear from you!

Cheers!

Marian

Sunday, 7 September 2014

Our Favourite Black Eyed Bean Salad


Do you know black eyed beans - or black eyed peas - as they are known in the USA? I must confess that I did not - until I met my beautiful husband - for whom they are a favourite food!

As a new bride I set out to impress him (of course) - and managed to butcher these beautiful beans in numerous ways!

I served them

  • too mushy - overcooked
  • too hard - undercooked
  • unpalatable - too salty
  • tasteless - not salty enough! 

We didn't have Google back then, how to cook them did not appear in any of my Australian Women's Weekly Cookbooks, I was too embarrassed to ask my new mother-in-law - and obviously - I had no idea of how I should cook them!

John would politely commend each new effort and say encouraging things - but I KNEW!

Eventually, from my many mistakes, I did learn - and now am proud to say - produce one of our favourite salads!

Black Eyed Bean Salad is healthful, tasty and easy to make - so it gets three ticks from me! I hope you enjoy it too, and add it to your family favourites!

Black Eyed Bean Salad


*Start this salad the day before it is to be served


Ingredients

250 grams dried black eyed beans
sea salt
bay leaf

Method

Place the beans in a large bowl. Add cold water until the beans are covered by 5cms. Soak overnight.
Next morning drain the beans and add to a large pot of water salted with sea salt. Add the bay leaf. Bring to a gentle boil and cook until the beans are tender - not mushy! This will vary for each batch of beans and may, in my experience, take as little as 15 minutes - or as long as 25 minutes! Drain and cool.

To Serve 

Place the black eyed beans in a serving bowl and toss through the following ingredients:

1 red capsicum - diced
2 tablespoons fresh parsley - chopped
2 spring onions - finely sliced
1 clove fresh garlic - finely chopped
freshly ground black pepper
2 sprigs fresh thyme (optional)
1 mild red chilli - finely chopped (optional)


The Dressing

Dress the salad by sprinkling over 1 tablespoon freshly squeezed lemon juice or your favourite white wine vinegar, followed by 3 tablespoons of your best EVOO (extra virgin olive oil). Season to taste with sea salt and freshly ground black pepper.

This makes a wonderful summer salad, and is a wonderful accompliment to steak, lamb, chicken or fish. Leftovers can be stored, covered, in the refrigerator for a day or two.

Enjoy!


Cheers!

Marian


Sunday, 31 August 2014

In My Kitchen ... in September

It's September! Spring is in the air!

In My Kitchen ... in September I thrilled that the new kitchen in our Coffin Bay Beach House is almost complete. We are still waiting for the rangehood to arrive. Once installed the splashback can be put up.


It was fitting that the first baking to occur in this new kitchen was the layered - and very tasty - White Chocolate Cheesecake and Vanilla Cake especially requested by Grandson No 1 for his ninth birthday! Here it is as we began to assemble it!


I love food wholesale warehouses and regularly shop for staples in these places. My stash from an hour at local Adelaide company 'Omega Foods' - which specialises in imported Greek products - included bags of my favourite Greek rock sea salt, authentic rigani (wild oregano) from Greece, Kalamata dried figs, local Kalamata olives, Australian feta cheese, chia seeds, chickpeas, black eyed beans, bulk dried figs and glace ginger and a bag of Greek wild chamomile tea. All this cost $60.79 - bargain!


This bunch of Greek oregano smells divine! With warmer weather approaching I'm dreaming of barbequed lamb marinated in lemon and a good sprinkling of this! Yum!


These gorgeous dried Kalamata figs are a perfect snack on the road when we travel  - and I love the resealable bag.


I just had to buy this bag of Chamomile Tea. It bought back memories of time spent in my husband's Greek village during spring. The heady perfume of the wild chamomile daisies that blanketed the landscape is a smell I will never forget.


A favourite local Italian restaurant Assaggio is now producing a range of excellent products for sale. From their dips range we enjoyed the Fire Roasted Capsicum and Cashew Nut Dip together with the Classic 'Tonnato' Tuna, Caper and Lemon Dip.


Finally, I've been making marmalade with oranges and lemons fresh from the garden. It's one of my favourite things to do in the kitchen! We love our marmalade flavoured with a dash of whisky stirred through as it is bottled. Served on grainy toast, a crossiant, hot scone or warm fruit bun it is amazing!


Do visit one of my favourite blogs  - Fig Jam and Lime Cordial - where the In My Kitchen series is hosted. There are fabulous things to be discovered there!

Thank you so much for visiting my kitchen this month!

Cheers!

Marian


Tuesday, 22 July 2014

Inspired Breakfast Porridge


We are home again! Having been away for several weeks - renovating our beach house - it was comforting last night to settle into a familiar, comfy and much loved armchair to read awhile.

Having purchased the latest (August) edition of Delicious magazine I read with interest the featured piece about one of my favourite Australian food bloggers, Sophie Hansen. I have followed her gorgeous blog  'Local is Lovely' for a couple of years now.

I was particularly taken with one of the featured breakfast dishes shared by Sophie - Pear and Spice Baked Porridge with Toasted Hazelnuts.

We love porridge and have it for breakfast most winter mornings. A new taste sensation for tomorrow morning's breakfast I thought!

Checking the fruit bowl and pantry cupboard I was disappointed to find that I was a couple of ingredients short! No pears for starters - we'd eaten those on the trip back home, and the hazelnuts at the back of the pantry cupboard - upon close inspection - went straight in the bin!

Disappointed I returned to my fireside seat and re-read that recipe - it still sounded wonderful.

This morning - inspiration! The deep red, sweet and succulent pot roasted quinces I had taken out of the freezer looked just the thing to top my breakfast porridge!

With a pinch of cinnamon added to flavour the porridge, and served with a dollop of thick creamy Greek yoghurt, I have to tell you, this morning's porridge was amazing - with special thanks to Sophie and Delicious magazine for the inspiration!

Inspired Breakfast Porridge


Ingredients per person*


1/2 cup of rolled oats
half a pot roasted quince (sliced)
generous sprinkle of ground cinnamon
Milk
Greek natural full cream yoghurt (our favourite is Jalna)

Method

Place the rolled oats in a cereal bowl. Sprinkle generously with cinnamon. Add cold water to the oats until the water level sits just below the top of the oats. Please note - too much water makes the cooked oats soggy, while too little makes them dry.

Top the oats with the slices of pot roasted quince. Place the bowl in the microwave. Cook on high for one and a half minutes.

Carefully remove the hot bowl to the breakfast table taking care to place it on a heatproof placemat.

To serve add 2 or 3 tablespoons of milk and top with a dollop of thick, creamy, unsweetened Greek yoghurt. No sugar needed!

Eat!!! Enjoy!!!

Sigh! Porridge will never be the same again!

Cheers!

Marian

PS: How do you enjoy your porridge?


Disclaimer: This is not a sponsored post.

Regarding the yoghurt - we fell in love with glorious Greek yoghurt when we visited Greece 18 months ago. Since returning we have tried many brands of yoghurt in search of the 'real deal'. Jalna Greek yoghurt is the closest we have found so far. If you have found a 'real deal' Greek yoghurt be sure to let me know!

Saturday, 5 July 2014

The Best Bacon, Bean and Vegetable Soup


It's been cold! It's been wet! It's soup weather!

Like me, at the first sign of cold, rainy indoors-by-the-fire sort of weather do you get the itch to make a large pot of soup?

Here at Coffin Bay, like much of southern Australia, we are experiencing a very wet and cold winter. Just the weather for a spot of soup making.

Doing the weekly shopping in Port Lincoln I found inspiration for this soup in a tray of beautiful bacon bones, a bag of mixed dried beans and an enticing range of fresh vegetables. They sung to me of a tasty Bacon, Bean and Vegetable soup!

Together with thick slices of warm crusty bread, this soup has made for an easy, tasty and heart warming lunch on the coldest of days.

It has been particularly welcome when we arrive home, chilled to the bone, from our beach house renovations!

Click here to see what we've been up to!


The Best Bacon, Bean and Vegetable Soup


Ingredients

2 meaty, smoky bacon bones
300grams minestrone soup mix (wash and then soak the dried beans overnight
 in plenty of water)
3 stalks celery
2 large carrots
1 large potato
1 onion
1 turnip
1 swede
1 tablespoon butter
Salt and pepper

Method

Drain the soaked beans and put aside. Peel and dice the vegetables.

Lightly grease a large frying pan with a little of the butter. Cook the bacon bones over medium heat until nicely browned. Place the bacon bones and beans in a large stockpot and cover with water or stock. Bring to the boil and simmer gently.

Add the remaining butter to the frying pan. Add the diced vegetables and cook over medium heat, stirring regularly, until the onions are opaque. Put aside until the beans in the stockpot are cooked when tested - this can vary depending on the beans - but is usually between 15 - 20 minutes.

When the beans are cooked add the vegetables - and more liquid to cover - if required. Bring to the boil. Reduce the heat and simmer for 30 minutes. The aroma filling your kitchen will be amazing!

Taste and adjust the seasoning of the soup with salt and pepper.

Remove the bacon bones to a plate. With two forks shred any meat on the bones and return the meat shreds to the soup.

Serve with toast or crusty bread.

Enjoy!


Cheers!

Marian


Thursday, 3 July 2014

In My Kitchen ... in July

After a couple of months off I'm excited to contributing again to the In My Kitchen series!


In My Kitchen ... in July I've said goodbye to this little kitchen in our Coffin Bay beach house. We are extensively renovating the house to meet our changing needs.


In my Coffin Bay kitchen this month I donned protective masks rather than an apron, used a grinder rather than a stick blender, and ground hundreds of spots on bricks rather than whip a storm in the kitchen!

I am hoping to be able to reveal the new kitchen next month!


While the renovation is underway, in the property we have rented, this is my kitchen. It is a very nice space in which cook! 


It's been particularly cold and wet so I've been cooking soups to warm us. This was a particularly tasty Bacon and Bean soup.


We love hearty chickpea dishes. This was served hot for lunch with feta sprinkled over! Yum!


Our next door neighbour dropped in with these little beauties - freshly caught local prawns! Cooked in oil with chilli and garlic, juices mopped up with crusty bread, they disappeared before I thought to take a photo!


At the monthly Coffin Bay Farmers Market I purchased supplies for a barbeque from ethical, free range prime producers 'Minniribbie Paddock'.  The Moroccan flavoured sausages are the best I have tasted anywhere!

Of interest is that this local farm is custodian of two registered rare old breeds of pig - the Tamworth and the Berkshire. These animals are raised free range.


Our two oldest grandsons came to stay so I had enthusiastic helpers assist me in baking - and devouring -  a double batch of Condensed Milk Cookies! Delicious!


To support good health I have been investigating foods packed with probiotics. This is my first attempt at the ancient health drink, Kombucha. I am very pleased at the 'mother' growing on the top of it - and it tastes OK too! I'll be making more!


Not my usual storm in the kitchen - but I do love freshly caught fish for dinner. This meant that I relented and used the stick blender to whizz up burley for my husband to use fishing! Whew - the smell!!!


Finally, I wish to extend my congratulations to Celia of Fig Jam and Lime Cordial, host of the In My Kitchen series, for being named Number 21 in the top Australian food blogs list for 2014!

Do visit Celia's inspiring blog - you will not be disappointed!

Thank you so much for visitng my kitchen/s this month!

Cheers!

Marian


 photo SSBADGE_zps2de55d46.gif