Thursday 19 December 2013

Spectacular Meringue and Red Fruit Salad Christmas Wreath


I love meringue in any form! I like meringue so much that when my mother asked my what type of cake I would like for my 21st birthday I requested tiers of meringue piled high and decorated with strawberries and cream. It was a triumph!

And so it is that for sweets at Christmas dinner, a very light meal in our family - having done the full traditional Christmas lunch complete with turkey and pudding - we serve a light marshmallow meringue in the shape Christmas wreath. Topped with a red fruit salad made with seasonal fresh berries and redcurrants, succulent cherries and watermelon stars it is much anticipated and a spectacular end to the meal!

With family spread across Australia 2013 has been our year to host an early Christmas gathering.  On a glorious December day recently we celebrated with an informal lunch under brollies in the backyard. Reminiscing and wrestling with the teepee - gift for Grandson 3 were popular! It was all over too soon - but then ... there's next year to look forward to!

I do hope you enjoy your Christmas with your loved ones. Merry Christmas!


Meringue and Red Fruit Salad Christmas Wreath


Marshmallow Meringue

4 egg whites at room temperature (I used large eggs)
1 cup castor sugar
a few drops of vanilla
2 teaspoons cornflour
1 teaspoon white vinegar
pinch salt

Set the oven 180 degrees centigrade.

Trace your wreath onto baking paper. Using a bowl or cake tin of appropriate size draw a large circle on baking paper - making sure the circle fits your baking tray.  Draw a smaller circle in the centre.

Add the salt to the egg whites and whip until stiff peaks form. Beat the sugar into the egg whites a quarter of a cup at a time. Beat until thick and glossy. Gently fold through the vanilla, cornflour and vinegar. Spoon the mixture onto your marked wreath moulding the mixture as high as possible. Smooth the top so that the wreath will lay flat on the serving dish.

Turn the oven back to 150 degrees Centigrade and place the meringue in the oven. Bake for 15 minutes.

Turn the oven back to 120 degrees Centigrade this time and bake for a further 20 minutes.

Switch the oven off and allow the meringue to cool completely in the oven.

Remove when cold. Store in a dry place.

*Make this a day or two before serving

Red Fruit Salad

Red seasonal fruit - strawberries, raspberries, blueberries, mulberries, redcurrants
Pitted cherries
Watermelon - chunked or cut into stars

Chill these well.

Boozey Syrup

Make a syrup with 1/2 a cup water and 1/2 a cup of sugar. Cook the syrup until it thickens and is at the soft ball stage. If using a candy thermometer cook until the mixture reaches 118 degrees Centigrade. Cool the mixture, then add 1/4 cup of a good rose wine and 1 tablespoon of your favourite brandy. Pour over the chilled fruit and allow to macerate for 20 minutes.

Whipped Cream

300 mls whipping cream
1 tablespoon icing sugar (sifted)
a few drops of vanilla

Place the chilled cream in a bowl. Whip to very soft peaks. Add the vanilla and icing sugar and whip until stiff peaks form. Chill.

To Assemble

Turn the meringue wreath over and place on serving tray. Carefully remove the baking paper.

Spread a layer of the chilled whipped cream over the wreath.

Drain tablespoons of the fruit and then place on the cream until the top of the meringue is covered with the fruit. Chill until serving time. Serve with a fabulous vanilla icecream.

Unbelievable!


Enjoy!!!


Cheers!


M

Friday 6 December 2013

Quick and Easy Raspberry Jam Scrolls

 Big eyes looked up at me.

'Granny, I'm soooo... hungry!' the small voice pleaded. 'Me, too!' a second little voice chimed in. How could I resist a request like that from Grandsons 1 and 2!

Thinking about what I could whip up quickly I replied, 'How would you like it if I made a batch of ...' 'Raspberry scrolls!' cried the two voices in unison!

And so it was decided - quick and easy Raspberry Jam Scrolls to satisfy the hunger pangs of two active and growing boys!


These are a great little recipe for when you need something quick, easy and tasty - for unexpected guests perhaps - or small boys!


Quick and Easy Raspberry Jam Scrolls


2 cups Self Raising flour
1 tablespoon sugar
pinch salt
60gms diced butter
3/4 cup full cream milk

Method

Preheat the oven to 200 degrees Centigrade. Line a 23x23cm square cake tin with baking paper.

Sift the flour and salt into a bowl. Add the sugar and mix through. Using your finger tips rub the diced butter into the flour until it resembles breadcrumbs.

Make a well in the centre and stir in half a cup of milk. Continue to add the remainder until you have a soft, sticky dough. Knead lightly until smooth. Dust the dough lightly with flour and turn out onto a piece of flour-dusted baking paper.

Using your hands gently press the dough into a rectangle approximately 30cm x 40cm. Spread generously with raspberry jam. Roll lengthwise into a long log.


Using a knife mark into 12 equal pieces. Cut into pinwheels and place cut side up in 3 rows of 4 in the cake tin.
Bake for 30 - 35 minutes until golden on top and 'hollow' to the tap.

 My oven is fan forced, so if yours is not add a few more minutes of cooking time - every oven is different!
Serve the scrolls warm to the hungry hordes! I guarantee they will not last long!


And now the reveal! Bravely I include this! At the time I was baking these tasty little treats I was also having my hair cut and coloured - at home by a friend! So this me - foils in hair - not quite looking my glamorous best!!! What do you think!


Oh, and I didn't even get a photo of the boys tucking into their scrolls! They ate them too quickly! But - they did leave me the lonely one below - although their Grandpa did fess up that he'd helped demolish more than one!

What special things do you bake for your loved ones?


Cheers!

M


Monday 2 December 2013

In My Kitchen ... in December

This fabulous series - In My Kitchen is hosted by Celia at Fig Jam and Lime Cordial. It is a fascinating sneak peak into the kitchens of bloggers from around the world and I feel privileged to be a part of it! Thank you, Celia!

In My Kitchen ... in December

In my kitchen ... in December the Christmas pudding hangs maturing in its calico cloth. This year I'm trying Maggie Beer's recipe from one of my favourite cookbooks 'Maggie's Table'. The uncooked mixture tasted superb - and OK, I admit I had more than one taste! I can't wait for the Christmas dinner reveal of the cooked pudding!


In my kitchen ... in December I am thrilled to have found my local Foodland Supermarket at Norwood is stocking Pepe Saya products! I will using Pepe Saya cultured butter to make a superb brandy butter to go with the Christmas pudding! Yum!


In my kitchen ... in December I am using this old chopping board - given to me by my late Mum.  It brings back treasured memories of cooking in her kitchen and learning from her! I do miss her, and Dad, and those precious moments. This beautiful board has a juice ring and is very useful when cutting anything that leaks! My Mum knew what she was doing!


In my kitchen ... in December my annual purchase of new Christmas tea towels will add a festive touch to doing the dishes!


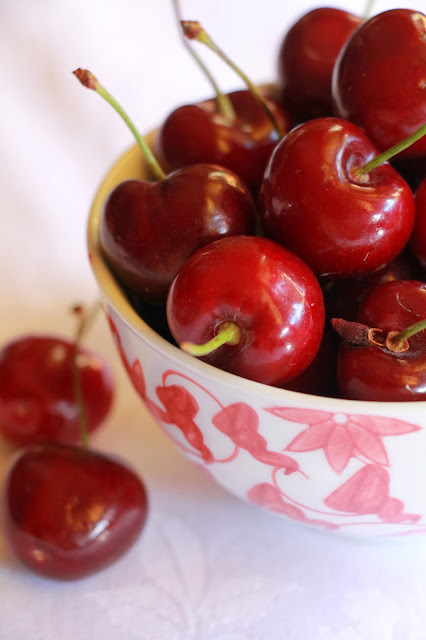
In my kitchen ... in December we are enjoying cherries grown in locally in the Adelaide Hills. How I wish the cherry season was longer!


In my kitchen ... in December these cookie cutters will get a workout! I make biscuits each year to give away as gifts.


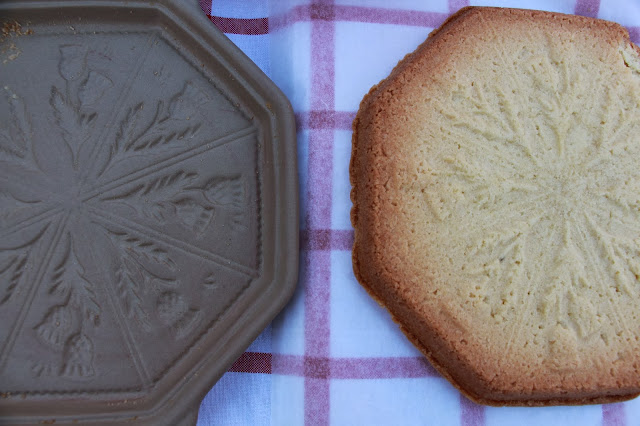
In my kitchen ... in December I'm using this stone shortbread mould. Bought at an after Christmas sale last year I fell in love with the Scots thistle motif. This Christmas it will be my way of paying tribute to the Scottish part of my ancestry!


Finally, from my kitchen to yours ... in December I wish you all a very Merry Christmas and Happy and Safe New Year!

Cheers!

M


Saturday 23 November 2013

In My Kitchen ... November


In My Kitchen ... in November I am enjoying the spectacular displays turned on by the beautiful jacarandah trees in full bloom throughout our city of Adelaide. These trees are a special favourite of mine!


In my kitchen...in November - yes, that's my kitchen! We live in a lovely old villa circa 1904. Every few years it needs some TLC to repair the cracks that are the result of shallow foundations and Adelaide's reactive soils. It really is worth it when it's done!


In My Kitchen ... in November I enjoyed producing morning teas for the workmen - Leo and John - with limited access to resources! These raspberry scrolls, served hot straight out of the oven - while I could access it - were a special favourite!


In my kitchen ... in November I have begun stocktaking my pantry cupboard and working my way through the multiple supplies there. Before retiring at the end of last year I was so busy that I bought the ingredients I needed for anything I was baking - just in case I had run out! As a result you do not want to know how many packs of icing sugar I found! These are some!!!

Any suggestions for how I might use them would be most welcome!


In my kitchen ... in November I am pleased, for the first time ever, to have the dried fruits and almonds for the Christmas pudding soaking in port - with weeks still left before Christmas. 

The calico has been washed - and I'm ready to make the best Christmas pudding ever!!!


It's actually been rather quiet in my kitchen in November because as well as coping with the kitchen repairs I am now also recovering from major surgery. I can't wait until December!

This series 'In My Kitchen ... ' is hosted by Celia on her wonderful blog Fig Jam and Lime Cordial. To enjoy the contributions of bloggers from around the world and sneak a peek into their kitchens I recommend you check it out!

Cheers!

M


Tuesday 8 October 2013

In My Kitchen ..... October

Thanks to encouragement from Liz at Bizzy Lizzy's Good Things, I am excited to participate for the first time in the 'In My Kitchen' series hosted by Celia at Fig Jam and Lime Cordial.  

Welcome to my kitchen! 


It's October - which means that here in Adelaide, South Australia the roses are blooming. These roses ramble over my front fence. They are a beautiful splash of colour in my kitchen! 


In my kitchen whilst rummaging around in the freezer I found the last container of peaches frozen earlier this year. Just as well - the peach tree is in full bloom with next year's crop!


In my kitchen I have been using Pepe Saya products courtesy of a prize pack I was lucky enough to win in a competition celebrating the three year anniversary of Bizzy Lizzy's Good Things blog. The flavour and quality of these products is amazing! Do try them!


In my kitchen I am enjoying the last of our abundant crops of climbing snap and snow peas, and broad beans that grew like those in Jack and the Beanstalk - seriously!


In my kitchen you will always find a bag of Joe's Poppy and Sesame Taralli. I purchase them from the best fruit and veg shop - in my opinion - in Adelaide. The shop - which stocks the best and freshest produce in town - is Metropolitan Fresh Fruiters St Peters run by Joe and Lisa Battista. You will find it located in The Avenues Shopping Centre, St Peters.


In my kitchen a guilty pleasure sometimes stolen is a cup of steaming, thick, velvety Seriously Rich Thick Dark Chocolate. Decadent - and expensive - it is a special occasion drink. I buy it from Rio Coffee, Stepney - another wonderful local business.


In my kitchen a firm family favourite is Spring Gully Sweet Spiced Gerkins and Gerkin Rounds. I remember these from my childhood! 

Recently an unprecedented response from the public of South Australia saved this local family owned company from financial ruin - a testimony to the high regard in which they and their products are held. It was a powerful lesson in the need to strongly support home grown produce and producers, and local businesses and companies!


I find it hard to resist attractive kitchen utensils. Do you? In my kitchen I now have this attractive bowl scraper - complete with a useful measure conversion table. I found it in Woolies!


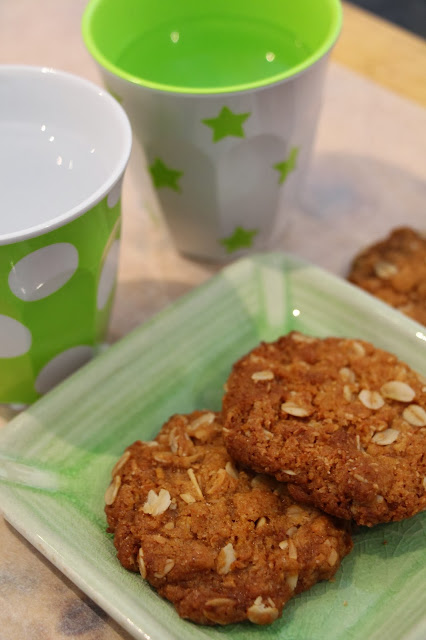
Finally, in my kitchen - at the request of growing grandsons -  I'm baking a selection of treats for their school lunch boxes - because 'Granny's cooking always tastes the best'. You can't say no to that! Anzac biscuits are always a favourite.


To read the contributions of other bloggers to this enjoyable series head on over to Fig Jam and Lime Cordial. There is good reading to be found there!
Cheers!
M


Sunday 29 September 2013

Good Things and Pepe Saya Products

I don't often enter competitions, but recently I was surprised, and thrilled, to win one of three Pepe Saya prize packs in a competition celebrating the three year anniversary of Bizzy Lizzy's Good Things - an inspiring blog that I follow.

Pepe Saya specialises in making handmade cultured single origin salted and unsalted butter - acknowledged to be of the very highest quality. Other handmade artisan products made by Pepe Saya  include Ghee, Mascarpone, Creme Fraich and Buttermilk.

Opening the lid of the cooler pack that arrived by Express Post I was delighted to find my generous prize pack contained seriously good things! A feast for the eyes, these comprised

  • 1x 225gm pack of cultured salted butter
  • 1x 225gm pack of cultured unsalted butter
  • 1x 300ml mascapone
  • 1x 300ml cream fraich
  • 1x 180ml pouring custard
  • 1x 1litre buttermilk.

Unfamiliar with Pepe Saya Products because they are not available in South Australia I was immediately compelled to sneak a taste test of the butter and cream fraich. Result - I just knew the diet was about to be blown! I was already transported to heaven by the perfume, flavours and textures of each - and I'd only tried two!

The products were truly outstanding and I felt I needed to know more about Pepe Saya. Watching the video A Culture of Butter - The Pepe Saya Story from FOOD WINE DINE on Vimeo I was impressed with the pride, passion, commitment and dedication of Pierre Issa - Mr Pepe Saya, and his small staff. This is a small niche business aiming to do great things with our most precious of resources - Australian grown and produced food products. We must support these businesses!

Watching the video showing the making of the cultured butters by hand  wonderful memories of my childhood flooded back!  There I was alongside my late mother in the laundry of the family farm - and together we were making butter from huge bowls of the thick, yellow cream produced by our Jersey cow, Daisy. I recalled the rich, sweet perfume and flavours of that cream and the mounds of butter that resulted. And, of course, Mum's amazing cooking!

Have you tried mashed potatoes thick and luscious with melted handmade butter and rich, yellow cream? No? Put it on your bucket list - don't count the calories - and use Pepe Saya butter and cream fraich for amazing flavour and texture, and all round good food experience!

To the question the competition asked  'Why would I like to win a Pepe Saya prize pack, and what would make with the products' I'd replied that I would use buttermilk to make a dozen featherlight scones that I would serve piping hot dripping with Pepe Saya butter, alongside others topped with a Quandong preserve I had recently made, and mascapone. I added, that served in my garden - sitting under the brolly this would be heavenly!

So, what did I make? Yes, true to my word I made Featherlight Buttermilk Scones - some served hot dripping with Pepe Saya butter, others topped with Quandong preserve  - with the cream fraich substituted for the mascapone. And, instead of serving them under the brolly I made them for our family afternoon tea held during the half time break of the AFL Grand Final this last weekend!

The verdict - to the last grandson - this afternoon tea was voted to be 'the best ever!'


My verdict - the Pepe Saya products I used - the buttermilk, salted butter and cream fraich are the very best quality ingredients I have ever had the pleasure to use in my cooking. I hope that I will soon be able to source them here in South Australia!

My attention is now turned to the remaining products in my pack - and I have ideas! Watch this space for the next Pepe Saya installment!

Finally I wish to sincerely thank Pepe Saya and Bizzy Lizzy's Good Things for the opportunity to be inspired by, and to use such wonderful products. I am truly grateful!


Featherlight Buttermilk Scones


500gm self raising flour
2 level tspns baking powder
100gm salted butter (I used Pepe Saya cultured salted butter)
pinch of salt
300ml buttermilk (I used Pepe Saya buttermilk)

Method

Set the oven 220 degrees Centigrade. Line a baking tray with baking paper.

Sift the SR flour, baking powder and pinch of salt into a bowl. Cut the cold butter into thin slices and drop into the flour.


Using your fingertips quickly rub the butter into the flour until the mixture resembles breadcrumbs. Make a well in the centre of the mixture and quickly stir in the buttermilk. Do not overmix.


Turn the dough onto a floured board. Handling as gently and as little as possible form the dough into a round about 3 centimetres thick. Flour a scone cutter and cut the dough into rounds, dusting the cutter with flour  in between cutting each scone.


Place the scones close together on the tray - this gives a better rise. Dust the tops of the scones with a light shower of flour, or, if preferred brush lightly with milk. Cook for 12 - 15 minutes until light golden on the top and the scones sound hollow when gently tapped. Move to a wire rack for cooling.


Enjoy any time!

Finally, I would like to say a huge thank you to my wonderful daughter, Sophie, who took 582 photos while I cooked! Check out her blog - Sophie's Kitchen Adventures here! Not only is she good with a camera, she's not bad in the kitchen either!!!

Cheers!

M


Friday 30 August 2013

Almond Fingers

Have you ever misplaced or lost a favourite, precious recipe? I had a moment or two of panic the other day when I experienced just this!

Fossicking through my extensive collection of recipes torn from magazines and newspapers, and those handwritten by friends and family I could not find my only copy of a favourite biscuit recipe - so the relief when I found that recipe was immense! I immediately decided I should record it here - where hopefully I'll always be able to find it!

The orginal recipe for Almond Fingers was a featured readers prize recipe in an Australian Womans Weekly magazine from a number of years ago. This is my version of that original recipe. 

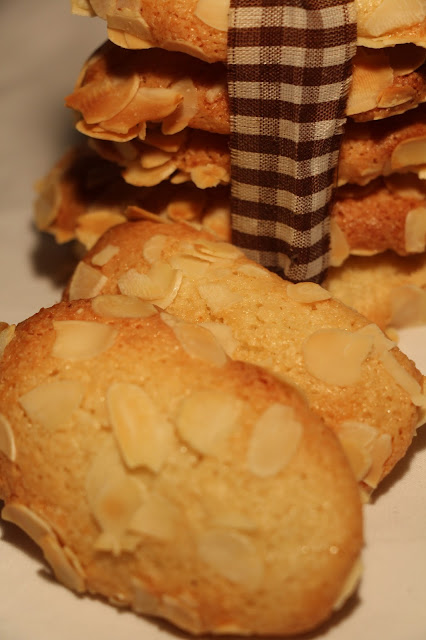
The biscuits are very easy to make, have a lovely chewy texture and are just perfect with a cup of coffee! There really is something very special about that flavour combination of almonds, vanilla and coffee!

You may even notice a variation of these biscuits amongst the choices at your favourite coffee shop!

Almond Fingers

1 and 3/4 cups of almond meal (I prefer almonds ground with the skins on)
1 cup castor sugar
2 tablespoons plain flour
2 tablespoons dessicated coconut
1 teaspoon vanilla essence
3 egg whites, lightly whisked (I use 700gram free range eggs)
2 to 3 cups flaked almonds

Method

Preheat the oven to 180C. Line oven trays with baking paper.

Combine the dry ingredients - almond meal, flour and coconut in a large bowl. In a separate bowl lightly whisk the eggs whites and vanilla together. Add these to the dry ingredients and mix together well with a metal spoon or spatula.


Fill a small bowl with warm water. Damp your fingers and form tablespoon sized pieces of the mixture into logs about the size of your thumb. Roll the log gently in the flaked almonds before placing on the oven tray. Leave room for the biscuits to spread.

Bake the biscuits for 12 - 15 minutes or until golden brown but with a moist centre in the biscuit. Cool for several minutes on the tray before gently removing to a cooling rack to cool completely.

The cooked biscuits keep well and can also be frozen.

Makes about 30 biscuits.


Enjoy!

M


Sunday 14 July 2013

Macadamia Toffee Crisps and Sweet Swap 2013

Picture this ....


Deck


Sea views


Holiday


5 o'clock - well, it is somewhere!


Wine in hand


Relaxed


July 1


A casual question


That casual question from husband John - in the space of a nano second - threw my relaxed state into into one of panic and called me to urgent action!

"That Sweet Swap blog thing - when are you meant to post off those sweets?" he enquired, breaking into my relaxed revere.

"Oh, next week - July 3rd - there's plenty of time," I replied, quietly pleased at his interest.

A little silence ensued.

"July 3rd," he repeated.

"Yes, we'll be home by then," I answered, as I drank in the view and took another sip of wine.

I will leave it for you to imagine my horror and dismay when he gently reminded me that we had decided to stay on for an extra few days in our top secret holiday destination - OK, beautiful unspoilt Coffin Bay - and that we were watching the sun set on July 1st!

New to blogging I had been excited to join my first blogging event - the 2013 Sweet Swap and had eagerly awaited the email notifying me of the three bloggers to whom I would send my package of sweets. I had tossed around idea after idea about what I would send - narrowing my list down as I considered current food trends, cooking techniques, how well the items would travel,  presentation and packaging and most important of all - taste.

Checking the blogs of the soon-to-be recipients of my sweets - Love Swah, Muppys and The Hangry Bitch - I was immediately impressed by the youth, sophistication, skills, experience and talents of each. How humble I felt in comparison. Where, I wondered, are all the comfort cooking baby boomer bloggers who managed to turn out those fabulous dinner parties of the 70's and 80's - surely I'm not the only one!

Back to the deck.... 


My immediate dilemma was that I had two days in which to have my sweets in the post. Plenty of time you would think! Well, life wasn't meant to be easy!

I found myself
  • an 8 hour drive from my kitchen
  • with access to only the basic equipment of a holiday apartment
  • the nearest supermarket was a 90 kilometre round trip
  • we were planning to return home on the very day the sweets were to be posted.
I was doomed! My first blogger event and I'd messed it up.

How appreciative I was when my ever resourceful husband rescued me! "Let's pack tonight," he suggested. "We'll head home tomorrow."

Indescribable relief swept over me. I can cook my sweet treats on Wednesday morning and package and post them later in the day. I am saved!

More culling of my list occurs on the long trip home. With limited time now I can't afford to do anything complex or to make any mistakes - and one of my recipients is allergic to almonds. The pressure is on!

I finally settle on an old favourite Toffee Almond Crisps, and decide to substitute macadamia nuts for the almonds. They are now Macadamia Toffee Crisps! The recipe is from the book that taught me to cook many of my favourite things - the original Australian Women's Weekly Cooking Class Cookbook.  I treasure my blotched, tatty copy. It's destined, I think, to become a coveted family heirloom!

Home Sweet Home....


Wednesday morning I'm out of bed early! I assemble the ingredients to make three batches of my Macadamia Toffee Crisps. Fuelled by numerous cups of coffee the kitchen becomes a hot house of activity. I'm beginning to feel how I imagine contestants in my favourite cooking shows must feel when under the pump. Hubby wisely decides to make a gracious exit and leave me to it!

I haven't made these crisps in years and so am excited when the first batch turns out perfectly - just like in the book! And I've remembered to take some photographs. Two ticks so far.

I confidently get the second batch going - but disaster ensues. Impatience has resulted in my failing to ensure that the sugar was completely dissolved before bringing the syrup to the boil. As a result the toffee tastes great but is crystallised.

I catch my breath and take extra care with the third batch.

By now time is racing away. I turn my attention to the packaging and ready the boxes. My hands are a bit trembly as I finally lower the crisps into the boxes and tie them up. Standing back, I'm quietly pleased with the way they look, and silently hope that my recipients will enjoy opening them - and enjoy eating the contents. 


Later there is a wonderful feeling of satisfaction as I hand the Express Post packages across the counter at the Post Office and send those Macadamia Toffee Crisps on their way. 'Travel well' is my final silent wish as I bid them farewell and send them off to far distant kitchens.

Checking the postbox I am excited to have received three intriguing parcels.


Gasps of delight!                                                                                                                              
Opening the packages reveals that I have been sent


They are all sweet mouthfuls of gorgeousness - I am transported to sugar fuelled heaven! 
Oh my! I can highly recommend these sweet treats!


I can't wait to try each recipe and so eagerly check out these bloggers and their blogs. Again I find that these fabulous cooks are clever, articulate and young! Hello, Gen H - hippies of the 70's! Is there anyone out there!

I had cause later on to reflect as I enjoyed yet another cup of coffee - and one more of each of the sweet treats I'd been sent - that participating in my first Sweet Swap had been much, much more fun - and more of an adventure - than I had anticipated it would be! 

Next year, I promised myself, I'll be prepared - Scout's Honour!


And so to the recipe.....


Macadamia Toffee Crisps


Ingredients


90gms butter
1 cup castor sugar
1/2 cup water
185gms chopped, toasted macadamia nuts
125gms chocolate


Method

Cover a large oven tray with baking paper. Mark with 5cm circles.

Chop the nuts and lightly toast in a moderate oven for 5 minutes. Watch closely to ensure the nuts do not burn.

Place the sugar, water and butter in a saucepan. Stir the mixture over low heat - but do not allow to boil - until the sugar is completely dissolved.

Proceed with caution as failure to ensure this step is completed satisfactorily will result in your crisps turning into a crystallised mess (see above)! Test by examining the mixture on the back of a spoon - it should be completely smooth and without even the slightest sign of graininess - which indicates undissolved sugar.


When the sugar is completely dissolved boil without stirring over high heat for 8 minutes or until a pleasing  dark golden brown. Remove the mixture from the heat and immediately add the nuts.
Stir only to combine the mixture. Too much stirring will also result in a sugary mixture.


Working quickly place spoonfuls of mixture into the circles and press out with the back of a spoon. Leave to cool. Makes about 18 - 20 crisps.


 Melt the chocolate and cool slightly. Turn the crisps over and spread the flat side with chocolate. Allow the chocolate to set before serving with a coffee.

You will have earned it!  Enjoy!


My thanks go to Amanda at Chew Town and Sara at Belly Rumbles for hosting this event. 


I, for one, can't wait for Sweet Swap 2014!

M


Tuesday 18 June 2013

The Easiest Slow Cooked Corned Beef Silverside Ever

In Melbourne for the weekend with our son and his family the weather was cold and miserable - and a home cooked comfort food meal was called for. We decided on Corned Beef Silverside served hot with lashings of cheesy white sauce and a medley of hot winter vegetables - cauliflower, carrots and peas.

Cooking the meat in the slow cooker for several hours results in meat that literally falls apart with the touch of a fork - preparation time - 5 minutes! It surely is maximum flavour for minimum effort! This is the recipe that has evolved over years of cooking this tasty meal!

Because of the 5 minute preparation time this dish is fabulous if you are going out for the day and want to come home to a homely hot meal, or, alternatively if you want to spend a lazy day in your PJs reading by the fire rather than slaving over a hot stove! Any leftovers make wonderful sandwiches the next day - just add your favourite chutney or pickle. Yummm!

Slow Cooked Corned Beef Silverside

1.5kg piece of corned beef silverside
1 large onion, sliced
1 length of celery, cut into 4 pieces
1 carrot, peeled and cut into chunks
1 tablespoon whole black peppercorns
3 bay leaves
2 cups low salt beef stock

Method
Place the prepared vegetables in the bottom of the slow cooker. Sprinkle the peppercorns over and add the bay leaves. Rinse the beef silverside under cold running water. Sit on the vegetables and pour the stock over. Put the lid on and cook on low for 8 hours or until meat falls apart when pulled gently with a fork.

Allow the meat to rest for 20 minutes prior to pulling apart for serving.

Enjoy!
 photo SSBADGE_zps2de55d46.gif